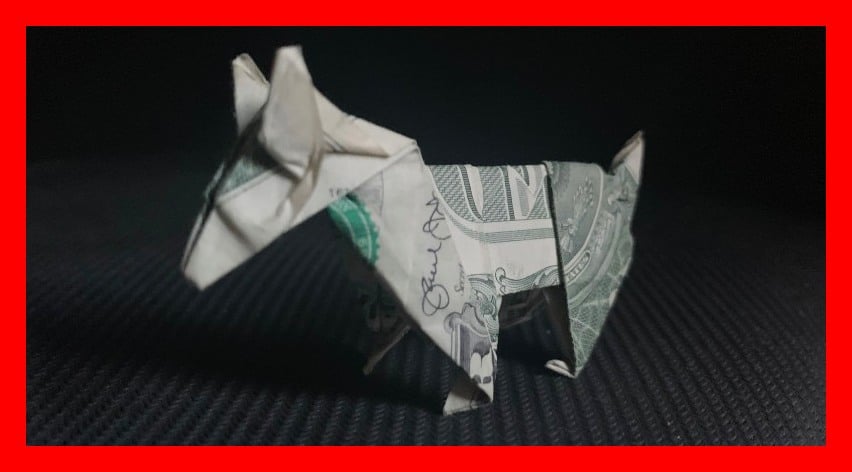
How to Make a Origami Dog From a Dollar Bill
Use this step-by-step guide to make your own dollar bill money origami dog. This not a super easy fold. It is actually quite challenging, but it is fun, and there are steps in which you can customize it to your liking. Folding this origami design will help you make a creative gift for a dog lover in your life! Let's Get Started! You may also like this other money origami guide: We will start on the backside of a one-dollar bill. Make the crease and then unfold the bill. Make the first fold to the "O," and crease it. Then make one fold right where the edge meets the "O" on the bill. This is just to make a crease and then unfold. You can use the letter "t" on top of the bill to guide and point the corner at it. Then make a simple fold from edge to edge on the bottom-left folded corner. Fold the bottom left edge as shown to make a crease. Then just turn the fold inside out, so the left part of the fold is on top, as shown in step 4. Fold the top left corner to the bottom left edge and then back up to the top edge. Repeat the same steps on the other side of the point so that both sides look the same. With the bill vertical, fold the left edge to meet the middle of the "O" on the bill. After the crease is made, you can then unfold it. This time fold the middle of the "O" line to meet the diagonal crease you just made. Once again, unfold it once you have made the crease. First, fold the top left corner to meet the vertical centerline. Then fold the top of the bill down to the top of the black circle. After the crease is made, unfold the bill again. Fold the top right corner to meet the vertical centerline. Then fold the top of the bill down to the top of the black circle again. After the fold is made, flip over the bill. Take the left edge of the bill to meet the middle of the "O" line. Make the crease and then unfold it again. Fold the horizontal crease line that falls in between the "C" and "A" in "AMERICA." Unfold it again once you have made the new crease. Fold the same previous horizontal line down about the edge of the "E" in "ONE." Make another similar fold from the middle of the "O" line to the other edge of the "E" in "ONE." First, squash fold the two left corners as shown in the picture. Just take it slow, as this can be a harder fold. Then shape the bordered edges inward slightly as shown. This does not have to be perfect by any means, just barely shaped. Repeat the same steps for the other side like shown. Again, it does not have to be perfect; you can do some more shaping later. Fold the dog together to make a crease, and then unfold it. Start by folding the bottom right up to meet the middle of the "O" line to crease it. Unfold it and then make a similar fold from the bottom left to the same middle of the "O" line. You will use the creases you made in the last steps to fold the dog in half again. Take both open edges on the back of the head and fold them over and forward to make a flat triangle like shown. Then fold the dog in half again like the previous step. These last parts are all personal preference for shaping. You can shape the front legs and neck by flipping it over and squash folding them how you like. Alternatively, you can slightly curl the front edges of the legs inward. Take the tail, push it under, and then fold the dog flat. Then fold it back out partially so the tail perks up. You can also do a similar style fold to the mouth area for some better facial shaping. These can be tricky, but it is not a big deal if you fold them wrong a few times. You basically pinch fold to make the shape of the ear you like and then fold it upwards. In other words, you first pull up a bit on where you want the ear. Then tuck both left and right sides to fold underneath the part you are pulling up on. The final shaping will probably be unique to your personal preference. You can curl the hind end in slightly and then curl the tips of the legs to make feet. Like previously mentioned, you can also easily shape the face how you like. We hope you enjoyed making this money origami dog or at least checking out this awesome design. HAPPY FOLDING! You may also like our other dollar bill origami animals:
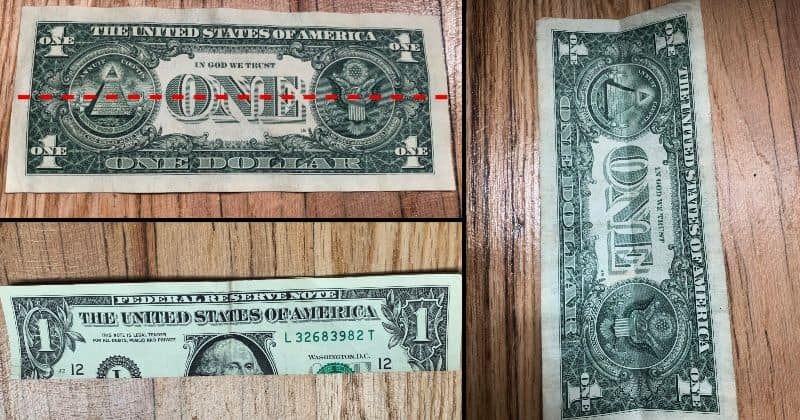
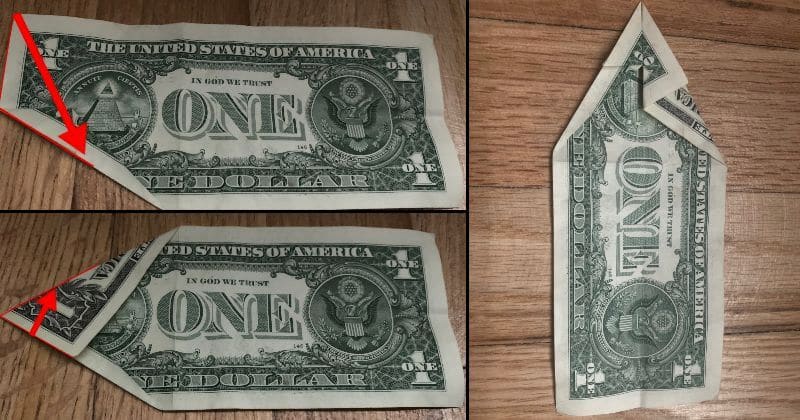
STEP 1: Fold the bill from the bottom to top lengthwise
STEP 2: Fold the top left corner to the middle of the "O" on the bill
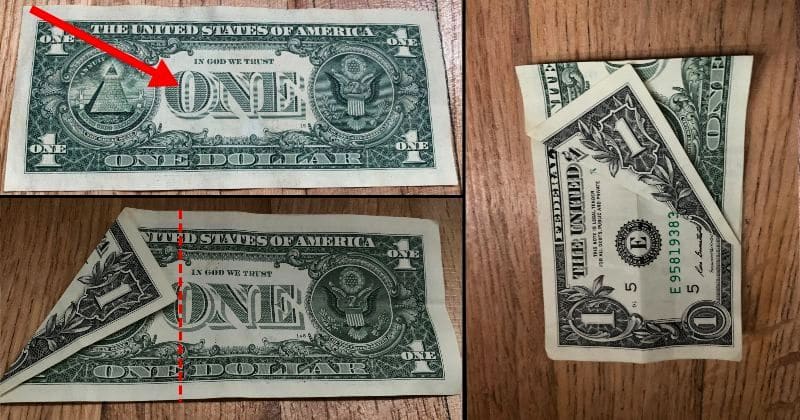
STEP 3: Fold the bottom left corner up and crease it
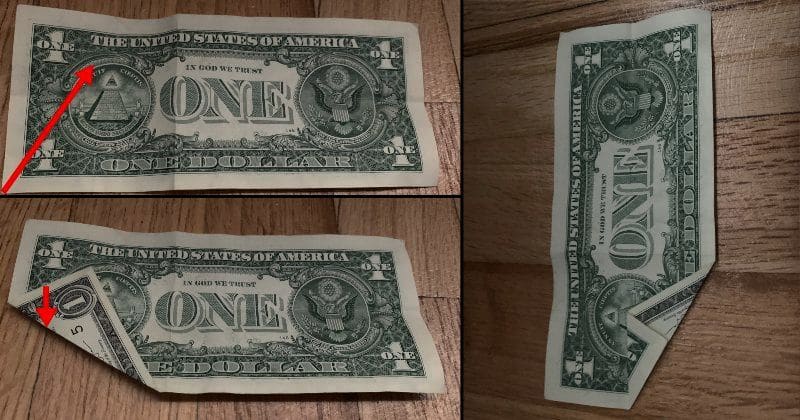
STEP 4: Make a few simple folds on the bottom left corner
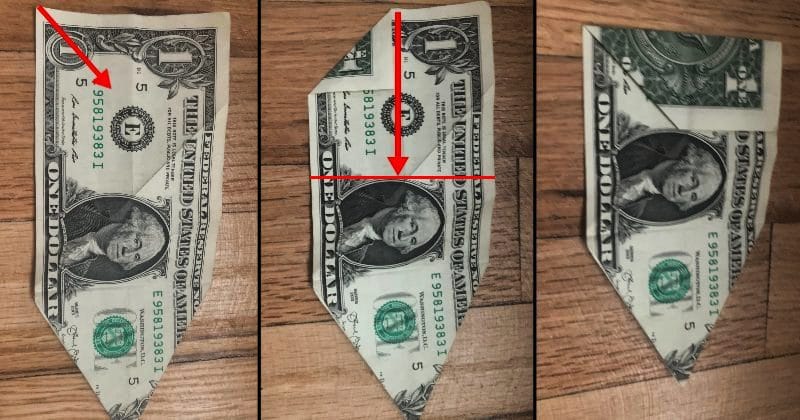
STEP 5: Fold the top left corner twice to make a point
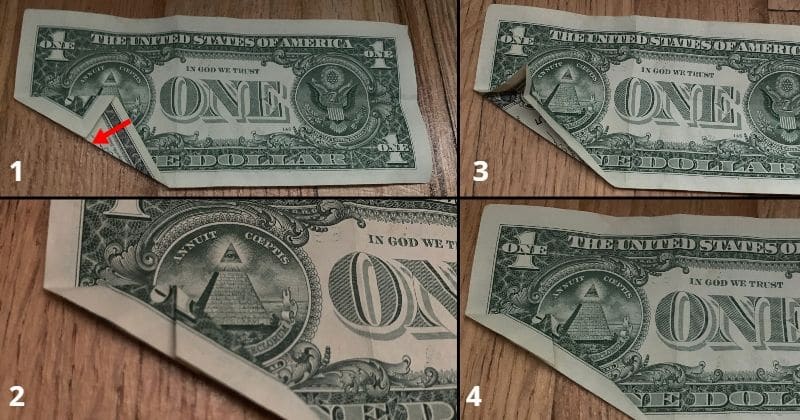
STEP 6: Fold the right side of the point to match
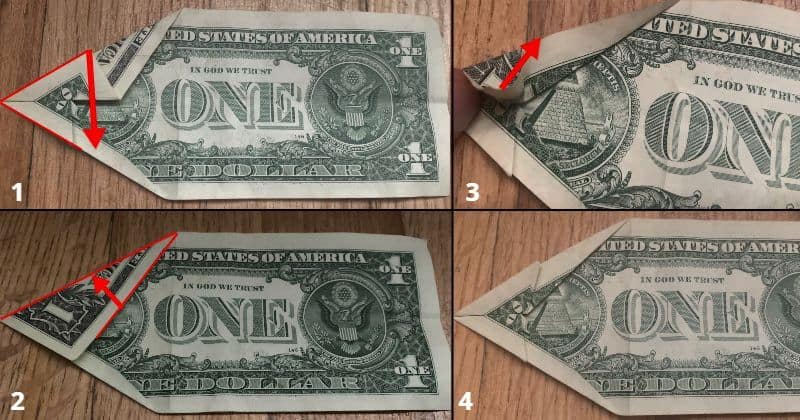
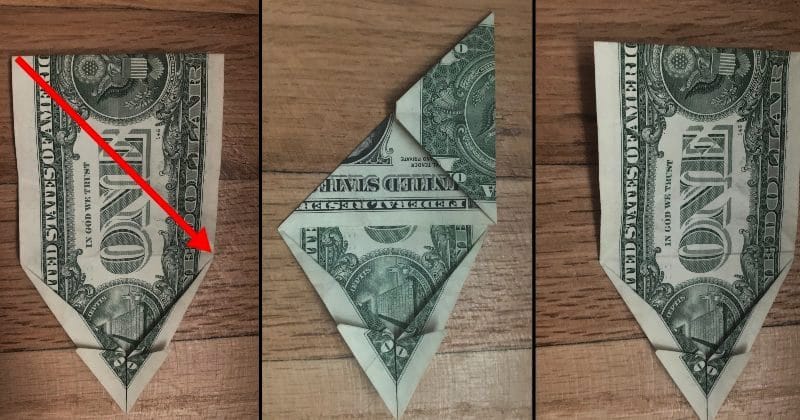
STEP 7: Crease the bill diagonally by folding the bottom left up
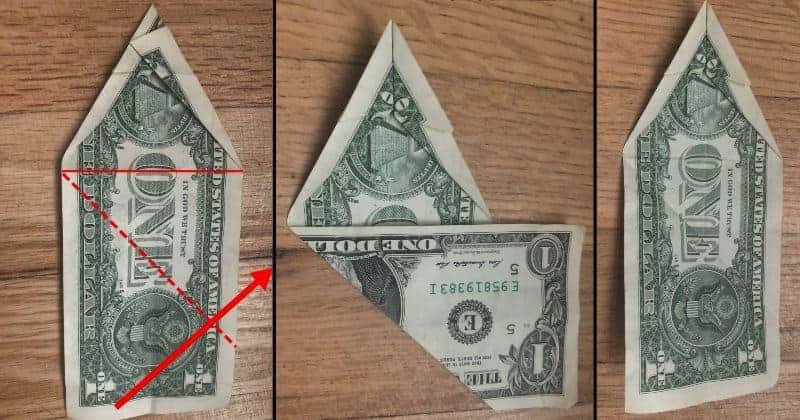
STEP 8: Fold the middle "O" line to the crease you just made
STEP 9: Fold the top corner, then fold the bill in half
STEP 10: Repeat the last step with the top right corner

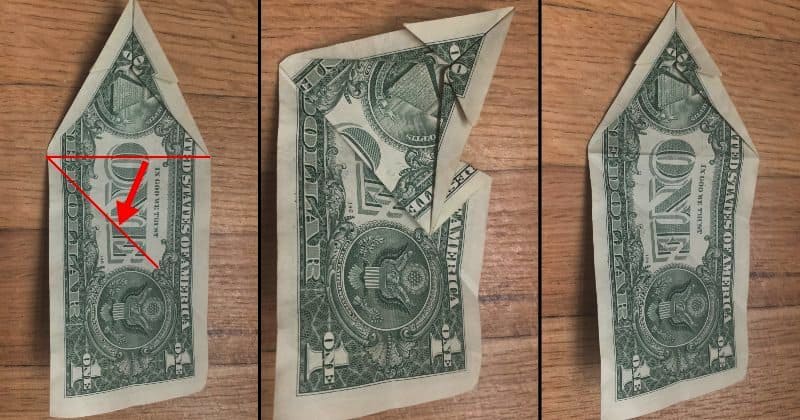
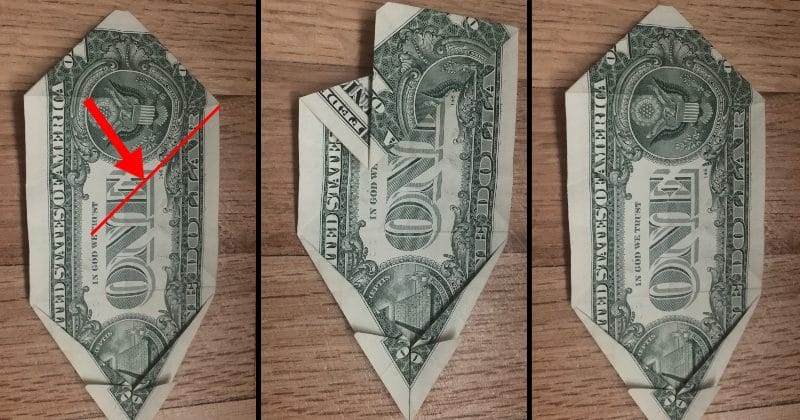
STEP 11: Fold the top left diagonally to the middle "O" line
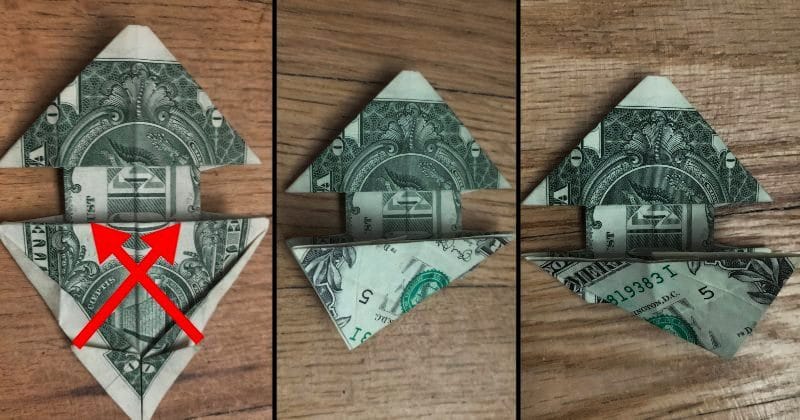
STEP 12: Fold the horizontal line to the crease you just made
STEP 13: Make two crease folds inward
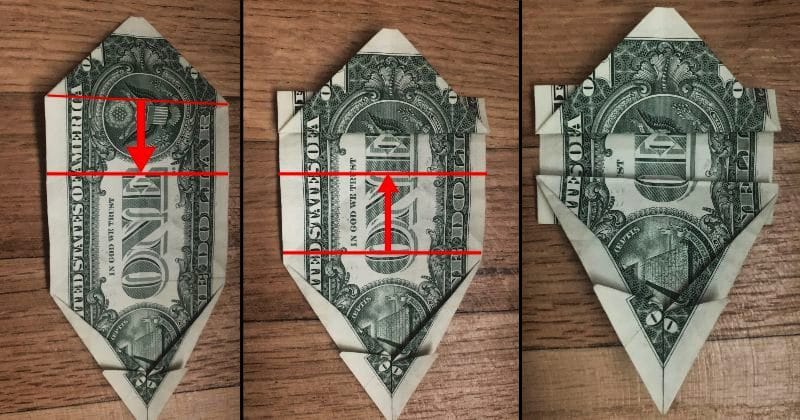
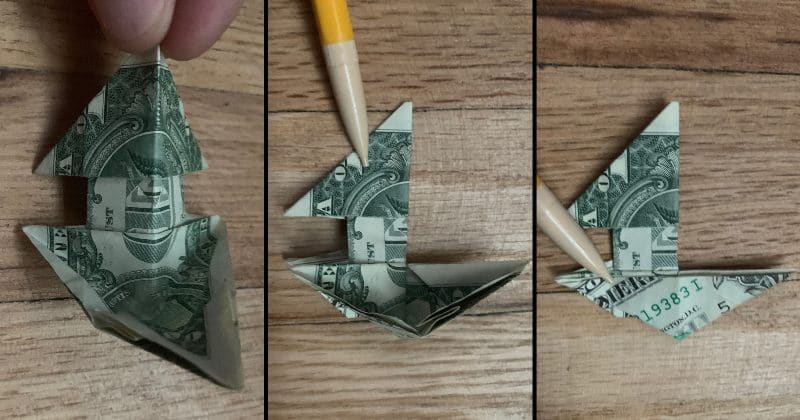
STEP 14: Fold the bill from the bottom to top lengthwise
STEP 15: Make squash folds on both sides to make the legs
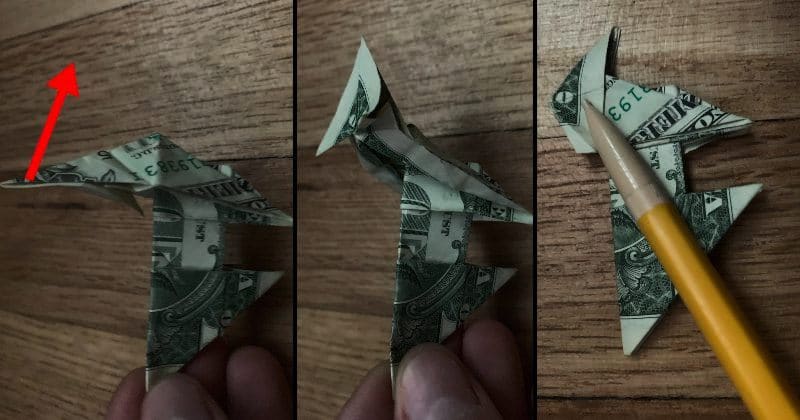
STEP 16: Fold the dog in half from legs to legs
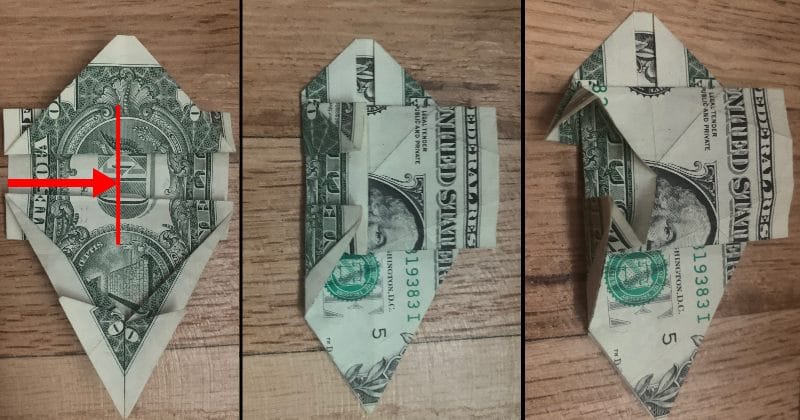
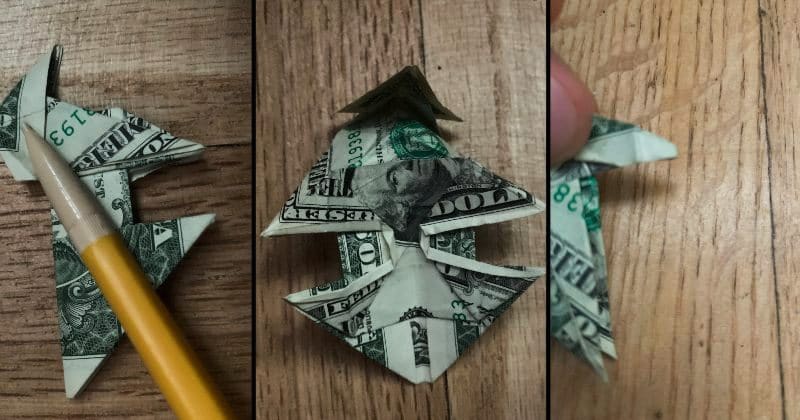
STEP 17: Make two crease folds as shown
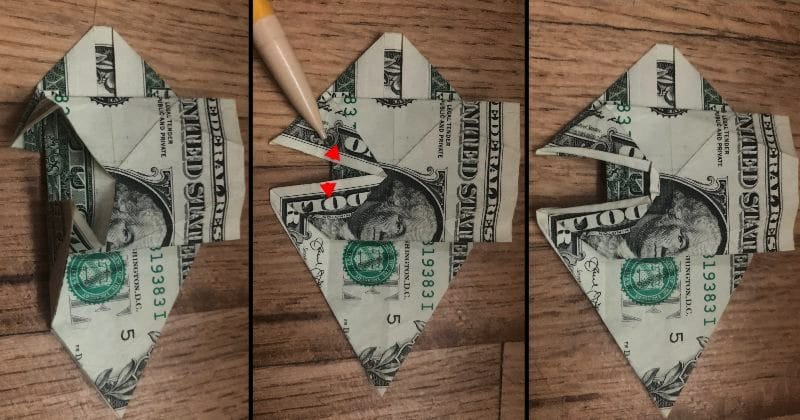
STEP 18: Fold the dog in half like shown
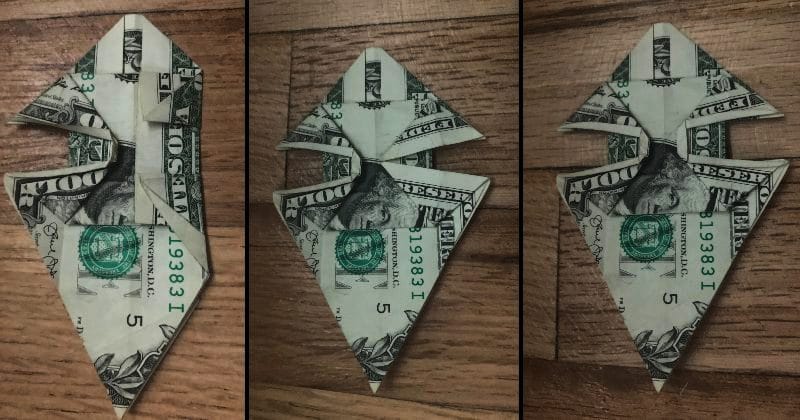
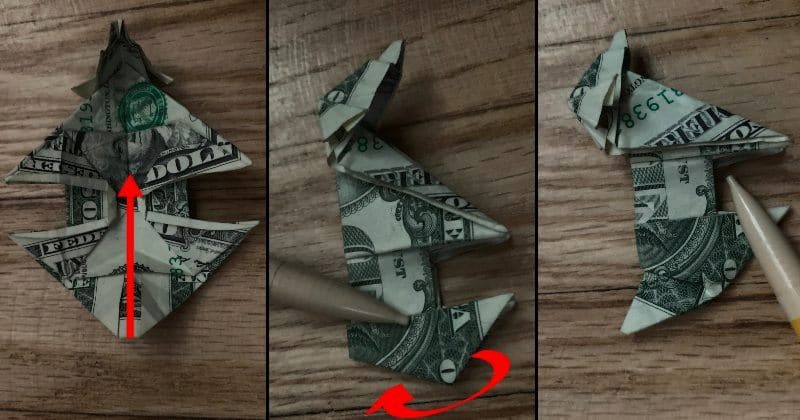
STEP 19: Shape the head by pushing the top forward
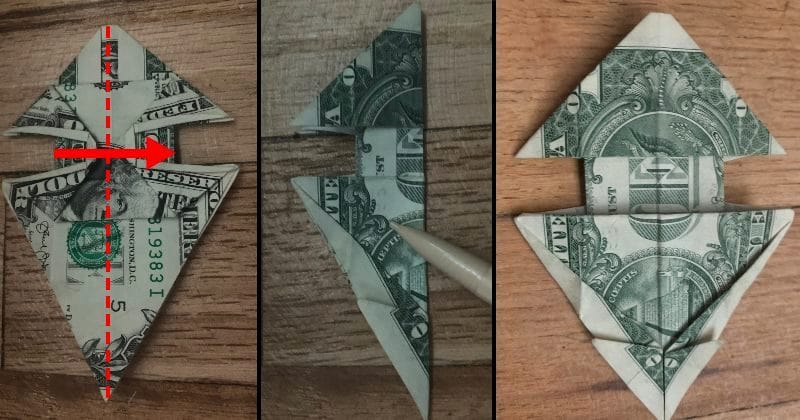
STEP 20: Shape the neck and front legs
STEP 21: Shape the tail by first tucking it between the legs
STEP 22: Shape and fold the ears
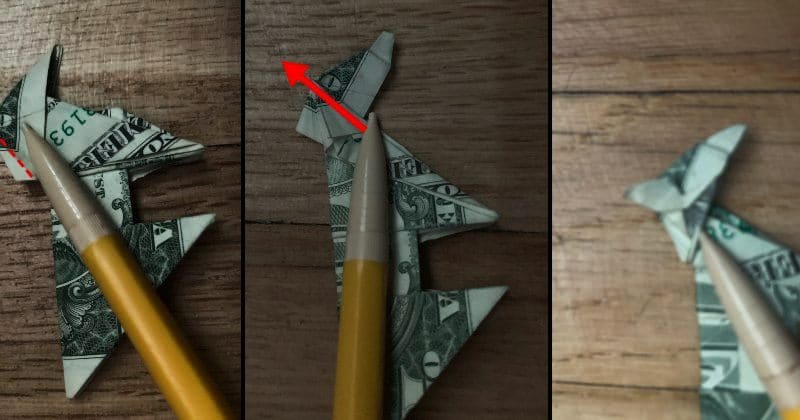
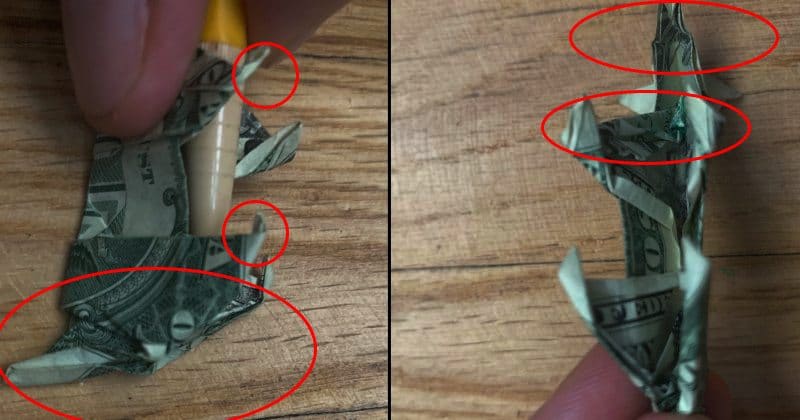
STEP 23: Do the last bit of shaping folds
How to Make a Origami Dog From a Dollar Bill
Source: https://the-daily-dabble.com/dollar-bill-origami-dog/
0 Response to "How to Make a Origami Dog From a Dollar Bill"
Post a Comment